Saturday, April 28, 2007

The Self Image

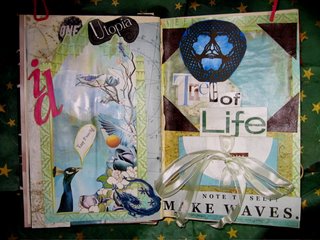
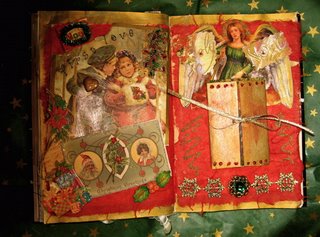
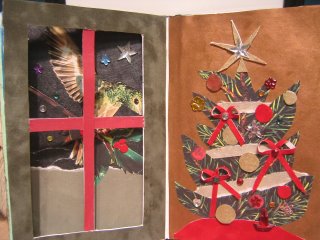
I have been in an altered book swap with some friends of mine, but the going has been slow, so I decided to start my own book. It's hard to get any instant satisfaction when your book is traveling across the country in a zig zag.

This book is one that I started myself for no reason other than boredom and the need to alter a book.

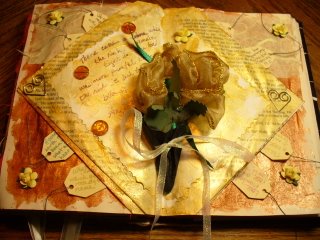
I found this great self help book at the antique store, it was only one dollar and the chapter titles are worth three times that price. I tried to use the book's own words to tell a story. These are the first spreads in the book, but is is far from done.


Flower Necklace

Today was the last class, I am sad.
I made some more of the hammered soldered rings to finish my necklace, and then attached the whole thing together with oval jumprings. I made a simple toggle for the clasp.


I found out today that we have access to the workshop for the entire day next saturday. I am very pleased about that.

I bought some gorgeous labradorite beads today with my christmas gift certificate. I can't believe it took me so long to use it.

Monday, April 16, 2007

Bezel set ring

I am late in posting this week.
On Saturday, we had bezel setting demos.
I decided I had to try it while the information was fresh in my thoughts. So, instead of finishing the flower necklace, I made this ring. I will finish the necklace this week.
This stone is an intersting combination of turquoise and I think green aventurine and amethyst. Feel free to correct me, as my guess is uneducated, I made this determination purely from the colors and texture of the stone.
I really want to join my local rock hound club...if there is such a thing.

I cut the shank out of 18ga silver sheet and sweat soldered it to my bezel which I made from 1/8in bezel wire and 24ga sheet for the bottom.
My last soldering, which was easy solder, seemed to make the solder joint on the bezel recede (I knew this could happen, but this was my first experience with it). I used hard solder on the bezel wire and medium solder to attach it to the base, then easy solder to attach the shank to the box bezel.

I worked on this ring for 4 1/2 hours and the stone is still loose. I really wanted to get it secure, but I was running out of time, and I don't have a bezel pusher at home. Maybe I can find something around the house that will do the trick.
I wore this ring all saturday night and all day sunday, and the stone is still in, just loose.

Saturday, April 07, 2007

Tube setting finally

Before I started to drill and set my stones into the flowers, I made a practice pendant. I worked so long already on the flowers that screwing them up in this final process would have been devastating to me.
This is a topaz of some sort, 6mm stone and one of the rings I had previously made. I soldered the tube setting to a back piece, and sawed and filed for a smooth finish. I soldered the filed tube setting to the inside of the ring. Then I sucessfully set the stone! YAY!

I really like this little pendant, I think I will just string it on a chain right through the ring.

I drilled out the middle of the flower with a burr bit, which proved to be quite a challenge. The soldered wire behaves nothing like sheet, that's for sure. Then I filed inside the hole until the tube fit into it snuggly on all joints. I soldered the tubes in place, and then off I was to the drill press.

Burring out the center of the tube is very picky, too. I started with smaller burr bits than I needed and worked my way to a larger size three times. It is easy to overdo it.

You can see in the close up that I could have done a neater job, but it was harder than I thought.

Next week we will do bezel setting.

Monday, April 02, 2007

My page in Cammy's book

Cammy was the first to work on my book, and now I finally worked on hers.
I did a spread in Cammy's book.
I hope she likes it.
It doesn't make much sense, but it was really fun to do.


My page in Leah's book

It has been a very long time since I received a book to work on. Last friday I got two in the mail.
This is Leah's book.
I call this 'Leah and her Ladybugs'.

Saturday, March 31, 2007

Flower necklace progress

Today we got tube and flush setting demontrations.
I made two more flowers both a bit smaller than the center flower. I also cut the tube for the cubic zirconias. Red in the center and clear on the sides. I will have to wait until next saturday to set them, as I still have to drill out the inside for the stone to sit. I also still have to file out a base in the center of the flowers and solder the tubes in place.
The flowers have been hammered flatter at the bend, still round at the center.
I don't know how far up the sides I will take the rings, I may just use 4 like the picture and use leather cord or a smaller chain for the rest.
I don't know...tune in next week and find out.


Here is a different angle (to view the tubes) and different set up. I had taken this picture at school.

Saturday, March 24, 2007

Flowers flowers everywhere

I really missed class last saturday. It seemed like an eternity between classes.

Back on track now.
Today I oxidized my petal ring with LOS and then polished it on the wheel. I couldn't get a great picture of it, the light was messing with the shininess.


I think I see myself in there...Heehee

Then I got to my next project, soldering. I cut these petals out of 14 gauge silver wire and then filed them so that they would have a nice fit. This took a long time. The soldering I did all at once. I made sure that the pieces were butting up against each other neatly, and then fluxed the whole piece and layed tiny pallions of solder on each of the five joints and heated until the flow. Very exciting!

This is a sneak peek of what I plan to do with this very 60's style pendant. I will make another of the curly bail thingy for the other side of the pendant, and solder those on. I plan to tube set the ruby in the center of the flower. I will either set it on top of the center, or carefully file out the exact fit of the tube in order to sink the setting a bit.


I stayed after class and made these five soldered rings, they are 18 gauge and hammered. Totally groovy links! I don't know what to do with only five of them, so I'll have to make more so I can have a chain. These are a bit smaller in diameter than a dime. I used a sharpie to coil the wire around and cut the rings with a saw.


Wednesday, March 14, 2007

Semi Truck + Power lines = chaos

I had a most surreal experience on my ride to work today.
I was driving the route I always take, a short boring ride through the neighborhoods of Norwood. As I approached the stop sign next to the post office, I noticed a semi truck one car ahead, slowly driving into the opposite lane to take a huge swing of a right hand turn. I had never seen a Semi on this road, nor do I think I should have. I came to a stop behind the car waiting for the semi to turn.

The semi took the right turn along with the cables that power half of downtown Norwood.

This next part is extremely hard to explain, it was in slow motion, right out of a movie. The power lines that clung to the front of the top of the semi truck began to bungee wildly back and forth, up and down, and a few of them began to snap and spark. My eyes were everywhere, watching the lines all around me, slowly coming towards me and then reversing direction and soaring till they were well beyond where they originated. They went back and forth until the driver ahead of me gunned his car to avoid the lash, and I followed.

I gassed the car so fast, and blew the stop sign, taking a left to avoid the pole just ahead that was swaying back and forth menacingly. I guess I thought getting in a car accident would be less troubling to me than getting lashed with live wires. Thankfully neither happened.

I arrived at work very shaky but safe, and had to calm down a bit before my hands were steady.

Saturday, March 10, 2007

Petal Ring

I completed my petal ring this morning.
I should have waited for some guidance, since I started to rivet the whole thing together before I spoke to the instructor about it, and now the petals are immobile.
You live and learn. I did get some tips on how to achieve this, but too late for this ring.
I still like the ring a lot, so no harm done.


After I completed the ring, we had demonstrations on a bunch of ways to solder. The demos took almost the entire class. The last 1/2 hour of class, I practiced soldering with some scrap copper. I sweat soldered some sheet scraps to a square piece of copper, and then soldered some wire onto the square as well. It wasn't any kind of design that I am proud of... it was just for practice, so I didn't take pics.

We will start on Project 3 in two weeks since next Saturday is spring break. I have two weeks to come up with a design that incorporates soldering sheet and wire, with any processes we have learned up to this point. I better put on my thinking cap.

Sunday, March 04, 2007

Picture Frame pendant

I have had a busy weekend, I couldn't post yesterday's work until now.

I finished the picture frame pendant. I cut out a tiny picture, and recycled a piece of plastic packaging to use as the 'glass'.

The whole copper, paper, and plastic sandwich is riveted in the center on either side, and one rivet in the center on the bottom.


Since my regular instructor was back, I got back to my ring after finishing the pendant.


I soldered on the post for the rivet, I still need to polish the ring to a high shine before adding the petals and riveting it all together.


I am going to finish the polishing at home this week and complete the ring next saturday.

Saturday, February 24, 2007

Project 2: take two

I really wanted to work on the ring today, unfortunately we had a substitute teacher who really didn't see my vision. As I showed her the project I was working on, she continuously made comments on how I should have done this or that first, and that this or that wouldn't work. I don't mean to say she was negative, but she clearly couldn't grasp the design. So instead of confusing myself and the substitute, I decided to start on something else and save the ring for my instructor who can envision the finished ring as I do.

I encouraged the sub to go through my sketches, and we chose this picture frame pendant. I initially wanted to make this pendant with tubes and rivets so as to have a space in between to change out a small photo. This version, however, will be a picture permanent in the frame, sandwiched between two pieces of copper, with a piece of thin plastic over the top of the picture.

I plan to search for a picture to include in this frame tomorrow. I am thinking of an impressionistic floral painting or something like that.


The side view... since this project needed to be formed and textured, I formed the sides slightly outward and the corners more so. The rivets will come into play once I find an appropriate image to incorporate. As it stands right now, I plan to rivet only the center of the two sides and the bottom. I initially wanted to rivet through the bail as well, but I formed the tip into a leaf and I realize that a rivet will just destroy the look of it.

So, this is what I did today in class. Next week I hope to finish this pendant and my ring that can't be done....yeah, we'll see.


Sunday, February 18, 2007

Project 2: work in progress

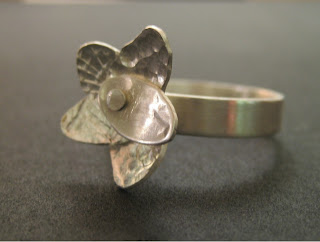
I decided on a design for a ring with free moving petals riveted to the shank. The blank for the shank was sawed out of 18 gauge silver sheet. The petals were sawed out of 20 gauge, drilled and formed slightly, and the wire that will connect the two is 14 gauge. The petals will each be textured differently.

I made seven petals, although I may just use five since height may become an issue. The texturing will thin them slightly, so I will just have to see how it goes.

The shank is soldered closed and the wire will be soldered to the shank before the final riveting.

So this is as far as I got today. I like the idea of taking pictures in different stages of the process, I wish I had done this with the ufo and the P.
I hope to sand the seam to invisible, and finish the shank to a high shine, as well as one petal, and the rivet. The rest of the petals will all have a feel and look all their own.

Saturday, February 10, 2007

Project 2: surfaces, cold connections, basic forming

Class today was just jampacked with a ton of information, and demonstrations.

Topics covered were:
Annealing sheet and wire, quenching and pickling, and the differences between base metals (bronze, copper, and brass), and gold and silver.
Texturing, using all manner of steel hammers and stamps. A very large catagory.
Forming, using dapping blocks, wood, steel mandrels, anvils...the list goes on.
Riveting with wire and tube.
Tube cutting.

I was originally faced with the fact that I was going to have to miss this class. When I enrolled, I knew that Julie would be gone this weekend, and I would have to watch the shop, but being the doll that she is, she would hear nothing of it. She volunteered mom to open up for the art classes, and await my arrival, telling customers that I would be along at about 1pm. This was the first class that I didn't stay in the workshop hours after class was over.

Class went over schedule today, we were let loose at just after 12:30 as opposed to the usual 12:15.
I wanted to skip out early, because my mom was watching the shop, but I couldn't bring myself to. It turned out that this was a crucial class that could not be missed. I ran to my car when I got out, and sped all the way to work. Thankfully for mom and I, today was not so busy as saturday's usually are...not thankfully for the shop, tho. Things seemed to be fine when I arrived at work, everything was okay.

So I am left to ponder my next assignment: Project 2.
I must have a detailed sketch by next saturday, and this project will take us the next three weeks to complete.

Here is the overview of what is expected, taken from my instructor Sandra's directions.

"Project 2: surfaces, cold connections, basic forming
This project will require the sheet metal of your choice, wire, appropriate saw blades and finishing materials, and layout materials.
Give the metal some dimension by forming over a mandrel or stake, or by dapping. Texture the metal by either hammering or stamping. The surface treatment should be considered an integral aspect of the overall design. In addition, projects must utilize rivets or other wire connections as decorative or structural elements.
There is a historical design convention of using repeating elements. As a starting point for this assignment, I suggest using the idea of pairs or multiples: in other words, motifs or elements that have some visual or conceptual relationship to each other. They could be abstract or representational. The overall format could be similar forms repeated with slight variations, or pairs, or the same element repeated several times.
Project due: March 10th"

So, I will be sketching some designs this week until I come up with something appropriate that I can actually execute.
My original thought was to somehow make a human form using rivets as the joints, but as I thought further on this subject, I think it may be too complex for my beginning class. I will attack this at some point, but for right now, I will just have to take some inspiration from the things around me to gather ideas. I am keeping my eyes wide open.

Saturday, February 03, 2007

First assignment, piercing...two dimensional design

I am really loving my metals class. Our first project was to make a two dimensional piercing in the metal of our choice. This assignment started last Saturday (1/27), and concluded this Saturday (2/03). I chose a simple framed ufo design. I used 18 gauge sterling silver sheet. I plan on soldering a bail to the back, I didn't want to just cut a hole for a jumpring. The polish is high, 1200grit, you probably can't see that from the photo, but I spent a lot of time on the finishing of this piece, and it will most likely be a gift once it is completed. I am really not a ufo type person, but I liked the design and it was simple. I got some great practice with the saw and drill press on this one. This piece is 1 inch square of silver sheet.


Since I made such a simple first design, I had time to make another. This is a copper dog tag for my favorite pet, Perry...we call him P. Another very simple design, but this one was made especially for P with love. I had planned to saw out the circle, but discovered that I had access to some cool hand tools like the circle punches. This tag was punched out before piercing. A 1" circle punch on 18 gauge copper sheet...brute force was key in the execution! It took quite a few precice blows with the hammer to finally get the hole punched out, and some more brute force to get the 1" punch out of the steel holder.
I think Perry will really like it, in fact, I almost wish I didn't waste so much time in the finishing, because I know after an hour of putting it on his collar it will look nothing like this. I have to wait until next week to give it to him, because he will surely destroy it, and since it is part of my assignment, I want it to be prestine for the instructor to judge next week...then P can have his way with it. This piece is a 1 inch circle of copper. I struggled with the lopsided P, but as I worked it, I grew fond of the cartoonish lettering.


I initially cut a square out of my copper sheet to saw the circle for Perry's tag out of, this was before I knew I could punch it out. Needless to say, I had a lot of waste. I decided to do something with the wasted copper. A circle in a square that was not centered. I decided to cut points as in sunrays into the scrap. I think this may end up being layered somehow into some other design with another metal underneath...I really don't know what to do with this, but I am sure it will end up being something or other. It is shown with the piece that was punched out. This piece is approximately 1 1/2 inches square...although its not square anymore.

Sunday, January 21, 2007

My Page in Holly's Book

I actually completed this page spread the last week of December 2006. A page for the new year. Holly is a party girl, and she knows the delight of a Harpoon, so I thought the focus of this spread was appropriate for the season.


First Metal Class

We got an overview of the class today. A lot of talk on safety and tools and rules and blah blah blah. The instructor is great. Her name is Sandra Bonazoli and she makes really cute kitchen utensils out of pewter. I already knew a lot of what she taught us today, but it was nice to hear the details, and I learned new techniques which is always a good thing.

After all the orientation, we had demonstrations of some of the tools we would be starting out with. The tools that are available for students to use are amazing. The first demo was for the metal sheet cutter, a mammoth machine that is all gravity powered. It cuts large sheets of metal into more manageable pieces, sheets as large as 4 feet by 8 feet. A long foot lever at the bottom to use your body weight to slice the metal. Very impressive.
A short demo of the drill press and I am not talking about a dinky dremel either...this press was an entity all its own, with a steel base floor to top.
Then we had instruction on how to properly cut with a jewellers saw.

After all the demos, we were each given a piece of brass sheet to practice sawing with.

We cut our simple designs out of brass sheet. Very beginner, but I did well with the saw, and I cut out a design of a simple 5 petal flower. I was pleased with the ease of the saw after hearing detailed instruction. I have been hand sawing my own rings, but have been apprehensive to try to saw sheet...I don't know why. I have some 18 ga silver sheet I have been looking at for months. I suspect by next Saturday I will have cut into it.

Next Saturday I will get my student ID, and will have discounted parking and discounts at the Art supply stores but more importantly, I will have access to the studio 4 days a week (limited hours). This access includes the two other Metal jewelry classes (without instruction) on Tuesday nights and Thursday nights, a couple of hours on Monday nights, and all day Saturday after my class is over.

I have already sketched out a design for the next class, but I suspect I will have at least a dozen by the time Saturday rolls around again.

Friday, January 19, 2007

Metals Course at the SMFA

I have been so excited to take my first metal jewelry course, and it starts tomorrow! I hope I can sleep tonight.

I am taking a metalsmithing course at the School of the Museum of Fine Arts in Boston. I think I have gotten as far as I am going to get without any human instruction. The course runs a full semester (1/20 - 4/28) every Saturday morning from 9am - 12:15pm.

Here is the course description taken from the smfa website:

Metals-brass, copper, bronze, and silver-can be shaped, molded, cast, cut, and altered to produce sculptural objects, jewelry, or decorative pieces. Through demonstrations and hands-on projects, this course will explore the fundamental skills and techniques in jewelry making. You will learn processes such as sawing, piercing, riveting, texturing, silver soldering, bezel setting, and simple casting. Projects will allow you to make pieces of your own design. This course is essential for beginning jewelry artists, sculptors in metal, or anyone interested in working with metals.


So, not only have I enrolled in a fantastic metals class, but I have left my Friday night social life to the cobwebs.

I will have one other day a week to work in the School studio with no instruction, either Tuesday nights or Thursday nights. I am really excited to learn how to manipulate silver into beautiful works of wearable art. I am psyched to take my jewelry making to the next level.

Friday, December 15, 2006

Nifty Framing

I have been inspired to start taking pictures of some of the more interesting framing jobs I have done. The most recent being some wedding gifts that I made for a great couple, our friends Forrest and Liz. Since I framed these without taking picutes, Liz was gracious enough to send me these pics.


This is a shadowbox I made using their wedding invitation. I matted the invitation in a red suede, and built up the sides to make it 3 dimentional. At the wedding itself, I collected certain items to include in the box. Then I closed the whole thing up and presented it to them. The feathers and red berries came from the centerpiece on my table...I had to explain to the other guests why I was gathering these things, and they all liked the idea, so no one gave me up. What you cannot see in the photo is a black cat hanging from the mat from his tail, these were on the rim of all the mixed drinks, very cool.


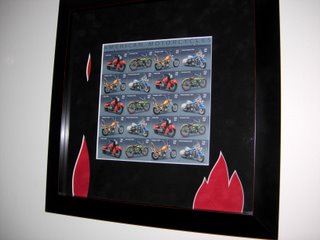
Set of USPS motorcycle stamps. Both Forrest and Liz ride, so I thought it very appropriate. This design was not original to me, as my sister Julie framed these same stamps the same way more or less for someone this summer. I just thought it was so cool, and I thought they would love it, and they did!

Ami's page in my book


This is the page Ami from McHenry, Illinois did in my book.
Everyone's pages are looking so different, I can't wait to see it in person!

Tuesday, December 12, 2006

My altered book

These are pics of the journey my book is going through right now.
The first are pics of the cover that I did, and my first pages, then what others have done.


This is after someone added a bow to keep it closed.


My sign in page...


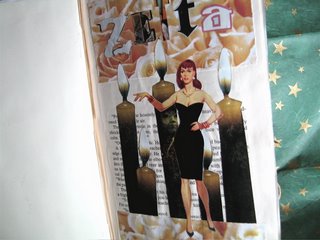
My Zetta page.


My Cowfirl page. Now my book is ready for its journey from Massachusetts...


This is Cammy's page. Cammy is in Gander, New Foundland, Canada.


Patti's fab Christmas page. Patti is from Fremont, CA.

Monday, December 11, 2006

Altered Book Group

I am in an online altered book group through a forum I frequent with other Jewelry Designers. I have been having a great time working on the books that are mailed to me and seeing the progress my own book is going through. If you don't know what an altered book is, it is just any old book that you turn into a piece of artwork. Pages are torn out, glued together for strength, and any medium is used to decorate pages.
There are 8 of us in this group, so my book will be altered by myself and 7 other wonderful women.
My camera broke in late summer, so since I have to borrow my sister Julies camera to take any pics until I buy a new one, I have not taken pics of the first book I did.
I did get photos of the second, and here it is.

My pages in Kelly's book


As it is the christmas season, I went for a christmas theme. I hope she really likes it.

Thursday, June 29, 2006

Perry's Dew Claw

Perry is doing much better, although I think it has a lot to do with me keeping tabs on his licking.
He totally knows the english language!
When I notice that he is 'worrying' instead of just licking every now and then, I say 'no licky pup' and he stops. It sounds like it may just be the sound of my voice but I can assure you that this dog actually knows what 'no licky pup' means!

I had a hard time getting the bandage off and the wound exposed, anyone who knows Perry, knows that he has some serious foot issues (all psycological) so it is nearly imposible to inspect his feet, nevermind take a bandage off!
It took two days to get the bandage off, and that was leaving a piece of very sticky tape on the back of his paw. This dangled there for another couple of days, but I finally removed it, with a little yelping from Perry. He seemed grateful when it was totally removed.

Anyway, his wound is healing, the dew claw bud is exposed which I think is very painful, but he is doing better and I hope it heals nicely.

Saturday, June 24, 2006

Freshwater Pearl Cuff Bracelet


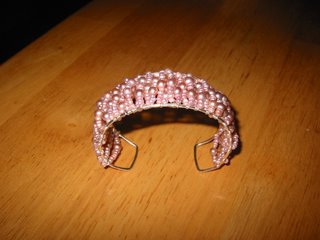
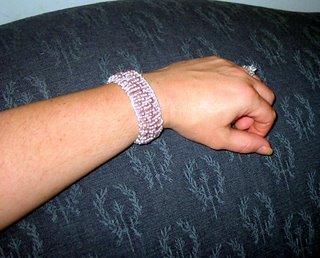
I just finished working on this cuff bracelet, although it is not done yet. I plan to add pearls along each side to hide the wire wrapping.
I am going to have to go get some more because I ran out of the colors I was using.
These pearls are about 2mm to 5mm in size and they vary in pinkish tones.


I used 16 gauge sterling silver wire as the base cuff (skeleton), and wire wrapped with 30 gauge sterling silver wire.
These pearls are so tiny, I went through a full 3 strands of them so far...and it's not even finished yet!

Thursday, June 15, 2006

Poor Perry!

Birdie died yesterday morning...so sad.

This morning Perry jumped off the front porch and ripped his do-claw in the process. It was gruesome, blood everywhere.
I took him to the vet which for some reason or another is terribly understaffed today, so who knows how long he will be there. I am afraid they will have to remove the little claw. I am so upset over this. Not to mention the fact that I am sure he will have to wear an upsidedown dunce hat around his neck which is never a fun experience. Poor Perry!

Tuesday, June 13, 2006

Baby Bird, hatched today?


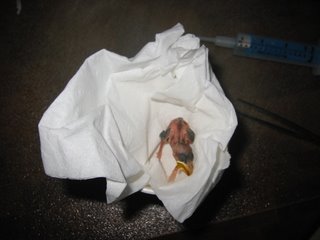
This morning a tiny bird fell out of the nest that is inside the back door to my sisters frame shop. By the time I got to work, the incredibly small creature was toast. A day of bright sunshine dried the poor thing out. It was heartbreaking to witness this process, but the bird had been dead since I got there, so it's not like I watched it die.


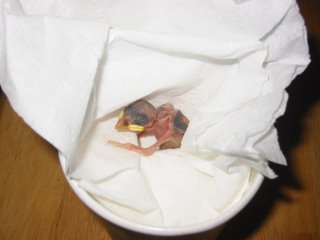
Tonight on our way out, to go home, there was another bird that fell out. It must have just fallen out, because about 15 minutes earlier it wasn't there. We struggled with what to do about it, and I guess since I don't have cats, and Julie has 4, I decided to take the bird and try to raise it until it can fend for itself. The nest is inside the building between the ceiling of the first floor and the second floor, so returning it to the nest was not an option. If we left it where it laid, it would most definately die.
Julie got a paper coffee cup and nestled some toitet paper in it for a cushion, and she carefully lifted the bird and placed it in the cup.
I called the Wildlife Rehabilitation in my area, and they told me that I could feed it mealworms, and water from a dropper. He also told me that he thought it's siblings most likely pushed it out of the nest. I went to Petco and got the worms, and the dropper and came home and fed one worm to the bird, who was actually pretty frisky for food, to my pleasant surprise.
I really hope this little creature lives through the night, I would hate to get bird flu and loose the bird in the process.

Monday, May 08, 2006

Endicott Estate show in Dedham


The Endicott Estate show ended up being a fun experience. Thanks to all who visited me there. I had a lot of help, mainly my sister Julie who maintained an air of mischievousness throughout the day, keeping the rest of us amused. She was my key to sucess. I actually quadrupled my expectaions. I would have been happy with making back my booth fee.
I had quite a group of help actually, my buddies Jape and Suzanne supplied a shelter so I could blend in, and tables and chairs. I had a very colorful table which I thought looked very nice. Jape made all my signs (and by the way, I love the font).
Mom showed up and ended up staying all day. Kathy ended up coming for the last hour, I was very happy she could help me with the break down. My husband came and went throughout the day, and I think he had fun, too.
It was sunny and cool, and I couldn't have asked for a better day. I had a lot of fun.